
Using CruEther 1G USB & 100M USB with CANoe: A How-To Guide
In our previous blog post, 4 Automotive Ethernet Converters & Network Adapters, we introduced you to the CruEther product family, focusing on the power-packed Automotive Ethernet Converters designed for test engineers and tinkerers alike. The CruEther line includes both media converters and network adapters, catering to various Automotive Ethernet needs, from 10Gbps media conversions to pocket-sized USB adapters. Compact and compatible, the CruEther devices enable seamless access, calibration, and analysis of vehicle data, especially valuable in diagnostics and testing setups.
This time, we’ll zoom in on two USB Network Adapters—the CruEther 1G USB and CruEther 100M USB—particularly popular among users of Vector’s CANoe software. These adapters are the best fit for CANoe setups, allowing robust communication between the test PC and the Automotive Ethernet control units (ECUs). Ready to dive in? Here’s your quick-start guide to configuring and using these two CruEther devices with CANoe.
Written by Danny Meyer
1. Initial Setup: Connecting Your CruEther Device
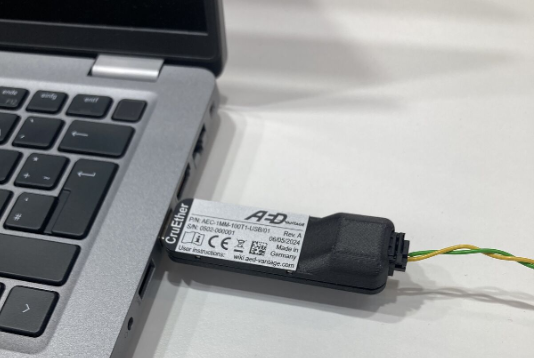
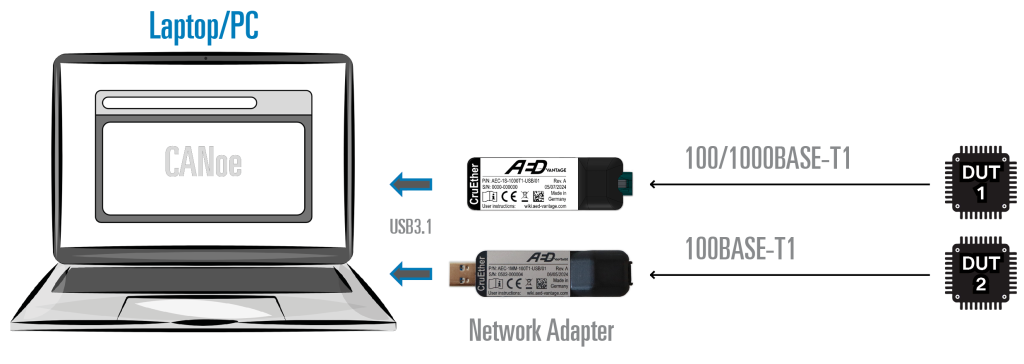
Let’s start with the basics. The CruEther 100M USB and CruEther 1G USB adapters come with a USB3.1 port for connecting to your PC. Once plugged in, the red LED lights up, signaling power. Both CruEthers have a connector to connect your Automotive Ethernet network. We recommend a maximum cable length of 15 meters. Depending on which device you have purchased from us, the following Automotive Ethernet standards are supported:
CruEther 100M USB: 100BASE-T1, 100Mbps following the IEEE 802.3bw standard.
CruEther 1G USB: 100/1000BASE-T1, up to 1000Mbps following the IEEE 802.3bw and 802.3bp standard.
Here’s the step-by-step:
- Add the Ethernet Device in CANoe:
In CANoe, navigate to your Hardware tab, click Network Hardware, and select your adapter type. The CruEther USB adapters typically show up as “LAN7801 USB 3.0 to Ethernet 10/100/1000 Adapter” in CANoe.
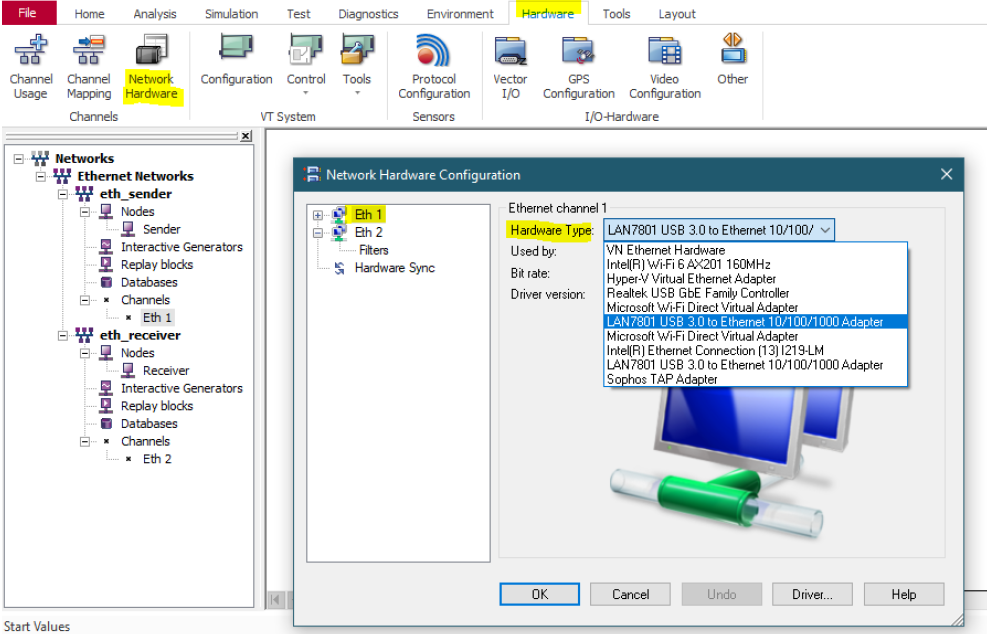
Network Hardware Configuration Dialog
- Set Up Hardware Configuration:
Select the adapter in the Network Hardware Configuration dialog, and click OK to save. - Install the Ethernet Vector Driver (if required):
If the CruEther isn’t visible in CANoe’s hardware options, you may need to install the Ethernet Vector Driver:- Go to Hardware > Network Hardware in CANoe.
- Choose “Windows Network Adapter (unavailable)” and follow the installation instructions to install the driver.
2. Setting Up a Sample Application with two CruEther
Now let’s bring CruEther to life in a small sample application. To do this, we need two CruEthers. In our case, we use two CruEther 100M USB. However, you can also use two CruEther 1G USB or build a mixed application. The following illustration shows what the setup will look like.
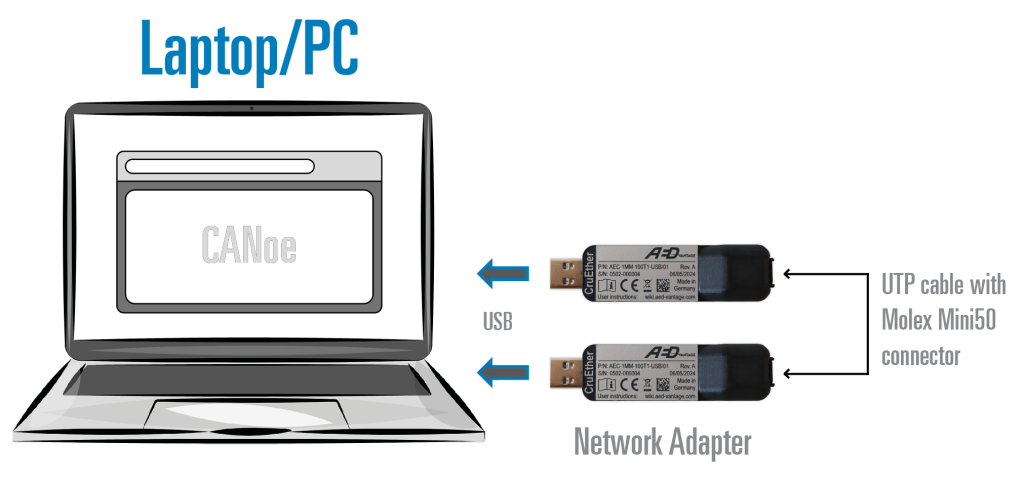
For this sample application, we have created a few documents and files that will help you with the implementation, both available from our Download Center:
- Application Note: AN_AEC_002-CANoe Sample Application
- CAPL code: Sample Application CAPL Source Code
The CANoe software provides two main workspaces—Setup Desktop and Measurement Desktop—for configuring and monitoring the data exchange.
Setup Desktop
This is where we configure the test nodes (Sender and Receiver) to use our CruEther adapters for message exchange via UDP:
- Assign Hardware:
In CANoe, navigate to Network Hardware Configuration and assign each Ethernet node the respective CruEther adapter. Set one device in Master mode and the other in Slave mode using the toggle switch on the bottom of the device. In our User Instructions Manual, which you can download from our Download Center, you can see which switch position corresponds to master or slave. - Use our CAPL code for both nodes: Double-clicking on the nodes displays the CAPL code that is used to implement the functionality of the two nodes. The CAPL code can also be downloaded from our Download Center.
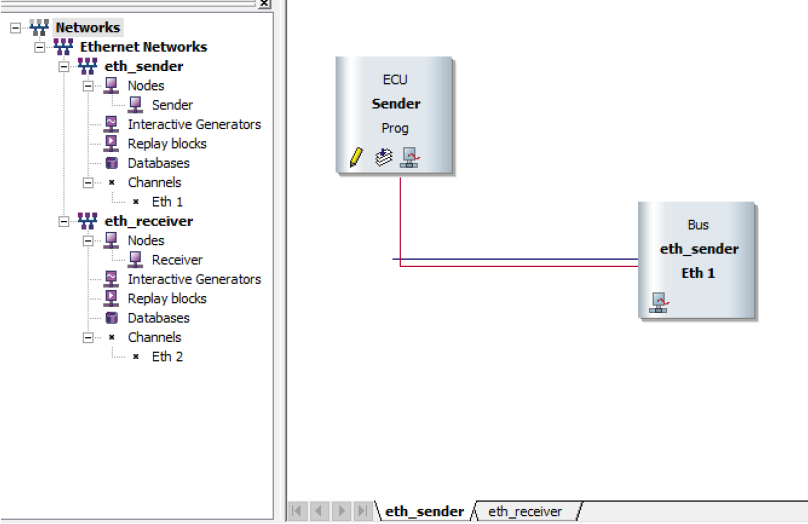
CANoe Setup Desktop
- Configure IP Stack:
Go to Simulation > TCP/IP Stack Configuration in CANoe. Ensure each device has a unique IP within the same subnet to facilitate communication.
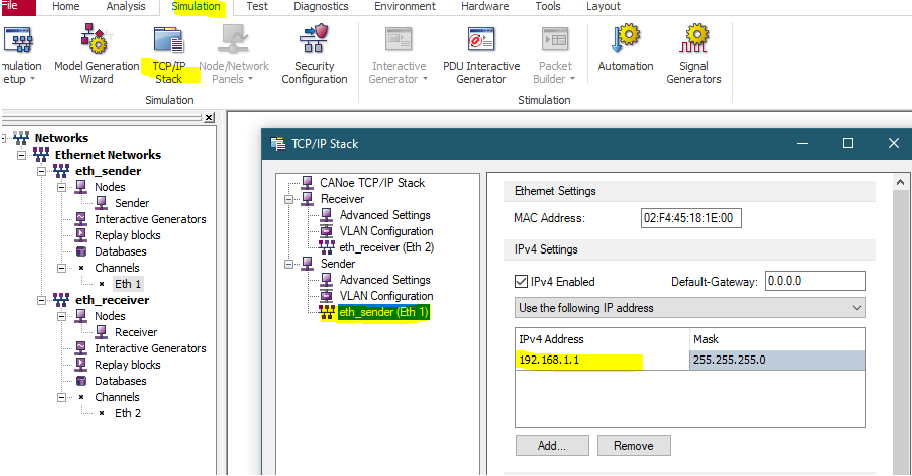
TCP/IP Stack Configuration ETH1 (sender)
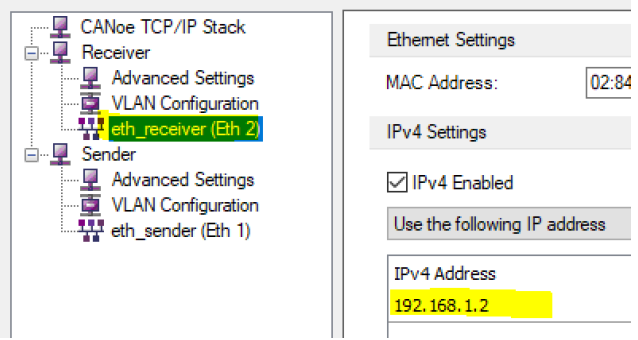
TCP/IP Stack Configuration ETH2 (receiver)
Measurement Desktop
The Measurement Desktop is where the magic happens—the live monitoring and controlling of the test setup:
- Sender and Receiver Panels:
The Sender Panel allows you to send messages, while the Receiver Panel displays the received messages, confirming data transmission.

Sender and Receiver Panel
- Trace View:
This shows Ethernet traffic in real-time, with each message logged once for the sender and once for the receiver.

Trace View
- Statistics View:
Keep an eye on the Ethernet packet count between the two adapters to confirm successful data transmission.
3. Running the Configuration and Transmitting Data
Once your setup is configured, here’s how to get things rolling:
- Start Measurement:
Click the Start button on CANoe’s main toolbar. This will automatically switch CANoe to the Measurement Desktop. - Send a Message:
Enter a message in the Sender Panel text box and hit Send. The message is transmitted as a UDP packet and should appear in the Receiver Panel. - Monitor in Trace View:
In the Trace View, you’ll see details of each packet exchange—IP address resolutions, data packets, and confirmations.
Final Thoughts
Outlook
We are constantly evaluating new technologies and consolidating the market in order to be able to offer our customers the right products. Of course, this also applies to the CruEther product family. We are currently investigating other Single Pair Ethernet (SPE) standards according to IEEE 802.3 such as 10BASE-T1S and 10BASE-T1L, both with a transmission rate of 10 Mbps.
We are also evaluating new industrial connectors in accordance with the IEC 63171 standard and the possibility of supplying power to end devices such as sensors, actuators and ECUs via Power over Data Line (PoDL). So stay tuned to see what’s coming next and check out our LinkedIn and youtube channel or follow our blog posts.
Related News
Contact us
How can we help you?
For further information on our automotive products and services, kindly contact us with your specific inquiry and we’ll get back to you as soon as possible.


